Recessed lighting is a popular choice for homeowners looking to enhance the ambiance and functionality of their living spaces. These sleek, unobtrusive fixtures blend seamlessly into ceilings, providing a clean, modern look while offering versatile illumination. Installing recessed lighting might seem like a complex task, but with the right guidance and tools, it can be a manageable DIY project. In this guide, we’ll walk you through the essential steps, from selecting the right fixtures and planning your layout to the actual installation process and key safety considerations. Whether you’re updating a room or brightening up your entire home, these tips will help you achieve professional results.
Let’s investigate this topic extensively with shzow.com
1. Choosing the Right Recessed Lighting Fixtures
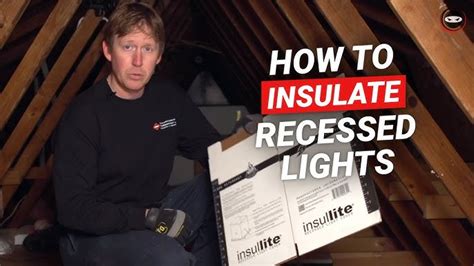
Choosing the right recessed lighting fixtures is key to achieving the desired look and functionality in your space. Start by considering the size and type of housing. For areas with insulation, IC-rated housings are essential because they prevent overheating. If your space lacks insulation, non-IC-rated options are suitable. The size of the fixture—typically 4, 5, or 6 inches—will affect the amount of light emitted and the overall aesthetic.
To complete your recessed lighting design, consider the trim style that best suits your decor. Baffle trims minimize glare, providing a softer light, while reflector trims maximize brightness. Adjustable trims offer directional lighting, perfect for accentuating specific areas or artwork. Finally, choose the appropriate bulb type, such as energy-efficient and long-lasting LEDs. The bulb’s color temperature will impact the room’s ambiance: warmer tones create a cozy feeling, while cooler tones are ideal for spaces requiring focused illumination. By making thoughtful choices, you’ll ensure your recessed lighting fulfills both aesthetic and functional requirements.

2. Planning the Layout and Placement of Lights
Planning the layout and placement of your recessed lights is essential for achieving balanced and effective illumination. Start by assessing the room’s function and the areas where light is most needed. For general lighting, space the lights evenly across the ceiling, typically 4 to 6 feet apart, depending on the size of the room and the fixtures. To avoid shadows and ensure even lighting, aim to keep the lights at least 2 to 3 feet away from walls.
Consider any specific tasks or focal points in the room, such as a reading nook, kitchen counter, or artwork, and plan to install task lighting accordingly. Adjustable trims can be used to direct light toward these areas. Also, be mindful of architectural features like beams or crown molding that might interfere with light placement. Finally, create a detailed lighting plan by marking the intended spots on the ceiling, ensuring that the layout aligns with the room’s design and purpose. Proper planning will enhance both the functionality and aesthetics of your space.

3. Necessary Tools and Materials for Installation
To ensure a smooth and efficient installation of recessed lighting, gather all necessary tools and materials beforehand. Essential tools include:
* A measuring tape for precise placement of the fixtures.
* A pencil for marking the ceiling where the lights will be installed.
* A stud finder to locate beams or other obstructions.
* A drywall saw or hole saw to cut openings for the fixtures.
* A screwdriver or drill to secure the housings.
For safe electrical work, you’ll need a wire stripper and voltage tester to handle the wiring. Electrical tape and wire nuts will secure the connections. Finally, a ladder or step stool is essential for comfortable access to the ceiling.
Before starting, gather all necessary materials. This includes the correct recessed lighting housings, trims, and bulbs based on your prior design. If your ceiling has insulation, you’ll also need insulation contact (IC) housings. A junction box and suitable wiring are crucial for connecting the lights to the power source. Having all these tools and materials ready will make the installation smoother and prevent delays.

4. Step-by-Step Installation Process
To install recessed lighting, start by turning off the power to the area where you’ll be working. Use a stud finder to locate and mark joists in the ceiling, ensuring your lights won’t interfere with them. Next, measure and mark the locations where the lights will be installed according to your layout plan.
Using a drywall saw or hole saw, carefully cut out the marked circles on the ceiling. Once the holes are made, run the electrical wiring from the power source to each light location, ensuring the wires are securely connected to the junction box.
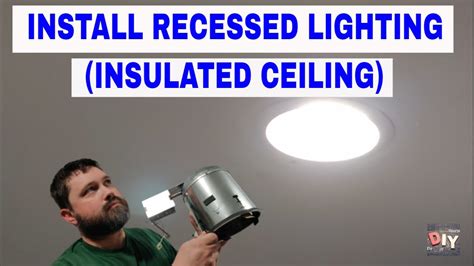
Insert the recessed light housings into the holes, making sure they fit snugly. Secure them in place with the provided clips or screws. Connect the wiring inside the housing, then attach the trim and bulb to complete the installation.
After all lights are installed, restore power and test the fixtures to ensure they are functioning correctly. Adjust any directional trims as needed to achieve the desired lighting effect
5. Safety Tips and Electrical Considerations
Safety is paramount when installing recessed lighting, especially since you’ll be working with electricity. Before starting, always turn off the power at the circuit breaker to avoid any risk of electric shock. Use a voltage tester to double-check that the power is off before handling any wiring.
Ensure that your recessed lighting housings are IC-rated if they will be in contact with insulation, as this prevents overheating and reduces fire risk. Non-IC-rated housings should have adequate space around them to dissipate heat safely. When cutting holes in the ceiling, be cautious of hidden wires, pipes, or ductwork.
Properly secure all wire connections with wire nuts, and wrap them with electrical tape to prevent loose connections, which could cause short circuits. Additionally, use junction boxes to house all electrical connections securely, keeping them accessible for future maintenance.
Finally, if you are unsure about any part of the process, consider consulting with a licensed electrician. Ensuring that your installation meets local electrical codes is crucial for safety and longevity, prevent
Installing recessed lighting is a rewarding DIY project that can transform your home’s ambiance. By carefully selecting the right fixtures, planning your layout, and following a systematic installation process, you can achieve professional-quality results. Always prioritize safety and adhere to electrical guidelines to ensure a successful and hazard-free installation. With these tips, your home will benefit from both enhanced lighting and a modern, streamlined appearance.
shzow.com
