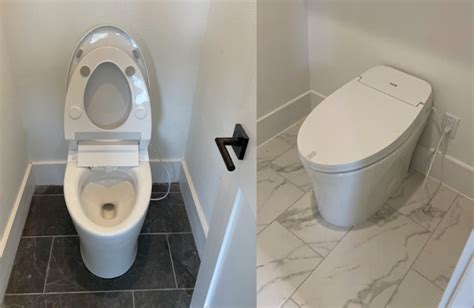
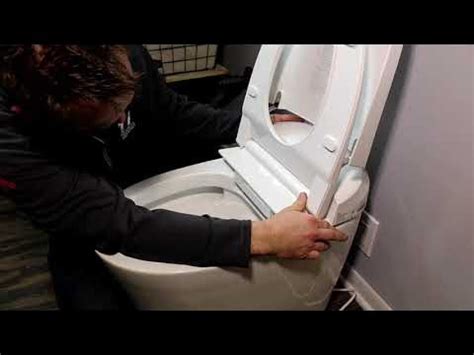
Upgrading your bathroom can significantly enhance both the comfort and value of your home. One of the most impactful changes you can make is installing a new toilet, which can improve efficiency, aesthetics, and functionality. Whether you’re replacing an outdated model or upgrading to a more eco-friendly option, installing a new toilet is a manageable project that you can tackle yourself with the right guidance. In this article, we’ll walk you through everything you need to know—from selecting the best toilet for your needs to installing it step by step—ensuring that your bathroom upgrade goes smoothly and leaves you with a refreshed, modern space.
Explore this topic thoroughly with shzow.com
1. Importance of Upgrading Your Bathroom
A bathroom upgrade is a smart investment that offers significant returns. Not only does it elevate the look and feel of a frequently used space, but it also enhances functionality and efficiency. A well-planned bathroom renovation can increase your property’s value, making it more appealing to potential buyers should you decide to sell.
Modernizing your bathroom with energy-efficient fixtures, like a new toilet, not only enhances your home’s marketability but also reduces water consumption and lowers utility bills. Upgraded bathrooms offer increased comfort and convenience, creating a more enjoyable space for your family and guests. Furthermore, improved hygiene and easier maintenance are additional benefits, as newer fixtures often feature stain-resistant materials and simplified cleaning designs.
Looking to create a more relaxing space, optimize your bathroom’s layout, or improve accessibility? Upgrading your bathroom is a strategic investment, and installing a new toilet is one of the simplest and most cost-effective ways to begin. By making thoughtful improvements, you can enjoy a more functional, comfortable, and visually appealing bathroom that meets your needs for years to come.

2. Choosing the Right Toilet: Types and Features
Selecting the appropriate toilet is essential for both comfort and efficient bathroom function. Several types of toilets exist, each boasting unique characteristics catering to diverse requirements. Two-piece toilets are the most prevalent and budget-friendly, featuring separate tank and bowl components. Alternatively, one-piece toilets offer a sleeker aesthetic, simplified cleaning, and reduced footprint. For smaller bathrooms, compact or corner toilets provide space-saving design solutions.
Another key consideration is the flushing system. Gravity-fed toilets, powered by gravity, are known for their quiet operation and reliability. Pressure-assisted toilets, on the other hand, use pressurized air for a forceful flush, making them ideal for homes with heavy usage. Water-saving models, such as dual-flush toilets, offer a choice between a full or partial flush, helping conserve water and lower utility bills.
Taller than standard models, comfort height toilets offer greater ease of use for seniors and individuals with mobility challenges. When selecting a toilet, consider its water efficiency, ease of installation, and overall design to ensure it complements your bathroom’s style and needs. A well-chosen toilet guarantees long-term satisfaction and functionality in your newly renovated bathroom.

3. Necessary Tools and Materials for Installation
To ensure a seamless toilet installation, it’s crucial to gather all necessary tools and materials beforehand. Having everything prepared will streamline the process and prevent any delays or interruptions.
For this project, you’ll need a few essential tools:
* Adjustable wrench: To tighten bolts securely.
* Tape measure: For precise measurements.
* Flathead screwdriver: To remove and secure screws.
* Utility knife: For cutting through old caulk or removing wax seals.
* Putty knife: To scrape off any residue.
* Level: To ensure the toilet is installed evenly and securely.
Materials:
* Wax ring or wax-free seal: This creates a watertight seal between the toilet and the floor.
* Closet bolts: These secure the toilet to the floor flange.
* New water supply lines: Replace old or damaged lines.
* Plumber’s tape: Use this to seal threaded connections to prevent leaks.
To keep your workspace tidy, make sure you have rags and a bucket readily available to absorb any leftover water from the old toilet. With these tools and materials at your disposal, you can confidently begin the installation process.

4. Preparing Your Bathroom: Steps Before Installation
Proper preparation is key to a successful toilet installation. Start by turning off the water supply to your bathroom. Locate the shut-off valve, usually near the base of the existing toilet, and turn it clockwise to stop the water flow. Next, flush the toilet to drain any remaining water from the tank and bowl, and use a sponge or towel to soak up any residual water.
Once the old toilet is empty, disconnect the water supply line by loosening the nut that connects it to the toilet. Carefully remove the old toilet by unscrewing the bolts at the base, lifting the toilet, and setting it aside. Be cautious, as toilets can be heavy and awkward to handle.
After removing the old toilet, inspect the flange—the circular fitting that connects the toilet to the drainpipe. Make sure it’s in good condition and clear of debris. If it’s damaged, replace it before proceeding. Lastly, clean the floor area thoroughly to ensure a clean surface for the new installation. By preparing your bathroom properly, you’ll set the stage for a smooth and successful
5. Step-by-Step Guide to Installing a New Toilet
Installing a new toilet might seem daunting, but with these clear instructions, the process can be easily tackled.
Position the Wax Ring: Begin by positioning a fresh wax ring onto the flange attached to the floor. This ring serves as a watertight seal between the toilet and the drainpipe. Make sure it is centered accurately to guarantee a secure fit.
Positioning the Toilet Bowl:
Carefully lift the new toilet bowl and align its mounting holes with the closet bolts protruding from the flange. Lower the bowl gently onto the wax ring, applying firm, even pressure to ensure a tight seal. Once positioned, rock the toilet slightly back and forth to help compress the wax ring and firmly secure the bowl.
Secure the Toilet: Tighten the nuts onto the closet bolts, being careful not to overtighten, as this could crack the porcelain. Use a level to ensure the toilet is seated evenly.
Attach the Tank (if two-piece):
If your toilet is a two-piece model, carefully place the tank on top of the bowl. Ensure the tank’s bolts are aligned with the holes on the bowl. Secure the tank by tightening the nuts, taking care not to overtighten them.
Connect the Water Supply:
* Reattach the water supply line to the fill valve on the toilet tank.
* Turn the water supply back on.
* Check for leaks as the tank fills.
Test and Adjust: Flush the toilet to verify its proper functioning. Make any needed adjustments to the tank’s water level or the flush mechanism, if necessary.
6. Common Installation Issues and Troubleshooting Tips
Even with careful planning, common installation issues can arise when installing a new toilet. Here are a few potential problems and troubleshooting tips to help you address them effectively.
Leaking Base: If you notice water leaking from the base of the toilet, it’s likely due to an improper seal with the wax ring. Try tightening the bolts slightly, but if the leak persists, you may need to remove the toilet and replace the wax ring, ensuring it is properly centered.
Wobbling Toilet: A toilet that wobbles or rocks may indicate that the floor isn’t level or that the closet bolts aren’t tight enough. Check that the toilet is level using a spirit level and adjust the bolts as necessary. You can also use toilet shims to stabilize the base.
Weak Flush: If the toilet isn’t flushing efficiently, the problem could be a blockage in the drain or an issue with the tank’s water level. Make sure the water level is set correctly according to the manufacturer’s instructions, and check for any obstructions in the drain.
Water Supply Issues: If the toilet isn’t filling properly, inspect the water supply line and valve for any blockages or kinks. Ensure the valve is fully open and that the connections are secure.
By addressing these issues promptly, you can ensure a successful installation.
7. Maintenance Tips for Your New Toilet
Maintaining your new toilet ensures its longevity and optimal performance. Start by cleaning the toilet regularly using a mild cleanser and a toilet brush to prevent buildup of stains and grime. Avoid using harsh chemicals that can damage the porcelain or internal components.
Check for leaks periodically around the base and the water supply line. If you notice any dampness or pooling water, address it immediately to prevent water damage and mold growth.
Ensure the tank’s water level is set correctly to avoid excessive water usage and ensure a proper flush. The water level should be about one inch below the overflow tube. If you notice any issues with flushing, inspect the flapper and other internal components for wear and tear and replace them if necessary.
Inspect and clean the toilet’s rim jets regularly to prevent clogging. If you experience persistent problems, consider scheduling a professional inspection
8. Conclusion and Final Thoughts
A new toilet can give your bathroom a much-needed boost in both form and function. Upgrading your bathroom’s throne is a straightforward project, as long as you choose the right model, prepare your space properly, and follow the installation instructions carefully. With a little planning and effort, you can achieve a successful upgrade.
A smooth installation process is achieved by addressing common issues with effective troubleshooting. Regular maintenance will keep your new toilet in optimal condition for years to come. Remember to choose a toilet that meets your needs for efficiency, comfort, and style, and ensure it is installed correctly.
These guidelines will empower you to confidently install your toilet and reap the rewards of a modern, efficient bathroom fixture. By investing a little effort in this upgrade, you’ll enhance your daily comfort and add value to your home.
shzow.com
