Installing laminate flooring is a cost-effective and stylish way to enhance the look of your living space. Whether you’re renovating a single room or your entire home, laminate flooring offers durability, ease of maintenance, and a wide variety of design options to suit any decor. This guide will walk you through the step-by-step process of installing laminate flooring, from gathering the necessary materials to adding the final finishing touches. Whether you’re a seasoned DIY enthusiast or a first-time home renovator, you’ll find this guide helpful in transforming your floors with a professional finish. Let’s get started on creating beautiful, long-lasting laminate floors in your home.
Dive deep into this topic alongside shzow.com
1. Introduction
Updating your floors is a simple way to transform your living space, and laminate flooring is a popular choice for many homeowners. This versatile, durable, and cost-effective solution offers the look of natural wood or stone without the high price tag. Whether you’re refreshing a single room or renovating your entire home, laminate flooring provides a stylish upgrade that’s relatively easy to install, even for DIY novices.
This guide will walk you through every stage of installing laminate flooring, from start to finish. We’ll cover everything from prepping your existing floor to adding the final touches, ensuring you achieve a professional outcome without requiring extensive expertise or specialized equipment. By the end, you’ll have the knowledge and confidence to install your own laminate flooring, creating a beautiful and durable surface that elevates the comfort and aesthetic of your home.

2. Materials needed
Before starting your laminate flooring installation, it’s crucial to gather all necessary materials and tools. This will ensure a seamless and efficient installation process. Here’s a list of the essential items you’ll need:
When selecting laminate flooring planks, consider the style and color that complements your home’s decor. To ensure sufficient coverage, purchase enough planks to cover the entire area. Remember to add an extra 10% to account for cutting waste and potential future repairs.
Underlayment: A crucial component for your laminate flooring, underlayment serves three key purposes:
* Moisture Barrier: Protects your floor from water damage.
* Sound Insulation: Reduces noise transmission.
* Smooth Surface: Creates a level base for your laminate planks.
While some laminate flooring options come with pre-attached underlayment, you may need to purchase it separately for other installations.
Tools:
Measuring tape
Carpenter’s square
Utility knife
Rubber mallet
Spacers for maintaining expansion gaps
Tapping block
Pull bar for fitting planks in tight spaces
Saw (a jigsaw or miter saw works best for cutting planks)
Safety goggles and gloves for protection
Additional Supplies:
Flooring adhesive (if recommended by the manufacturer)
Trim and transition pieces for finishing the edges of the floor
A pencil for marking cuts
By having these materials prepared, you can ensure a smooth and efficient laminate flooring installation.

3. Preparing the floor
Proper floor preparation is essential for a successful and durable laminate flooring installation. Start by clearing the room completely, removing all furniture, rugs, and other objects. Thoroughly clean the floor, eliminating dust, dirt, and debris that could hinder the installation process. If installing over existing flooring, ensure it is even, dry, and free from damage. Address any unevenness by applying a leveling compound to create a smooth, flat surface.
Installing Laminate Flooring:
* Concrete Subfloors: Before laying laminate flooring over concrete, thoroughly inspect for moisture problems. Install a moisture barrier, such as plastic sheeting, across the entire area to prevent moisture from reaching the laminate.
* Wood Subfloors: When installing laminate flooring over wood, verify that the subfloor is firmly nailed down and free of squeaks or loose boards.
Before starting your laminate flooring installation, carefully inspect the doorways, baseboards, and trim. You may need to remove or undercut them to ensure a snug fit for the laminate planks.
Next, allow your laminate flooring to acclimate to the room’s temperature and humidity for a minimum of 48 hours. This crucial step helps prevent expansion or contraction of the planks after installation.
Finally, ensure your subfloor is clean, level, and dry. Once these conditions are met, you can confidently begin installing your laminate flooring.

4. Installing the underlayment
Installing the underlayment is a critical step in preparing your floor for laminate installation. Start by rolling out the underlayment across the length of the room, ensuring that it covers the entire floor surface. If your underlayment comes in multiple sheets, make sure to butt them closely together without overlapping, as this could cause unevenness in the laminate flooring.
As you lay down the underlayment, use a utility knife to trim it to fit around corners, doorways, and other obstacles. Secure the underlayment in place with adhesive tape if needed, especially at the seams, to prevent it from shifting during the installation of the laminate planks. Make sure that the underlayment extends slightly up the walls, as this will help with soundproofing and moisture resistance. Proper installation of the underlayment creates a smooth, insulated base for your laminate flooring, ensuring a quiet, comfortable, and durable floor.
5. Installing the laminate planks
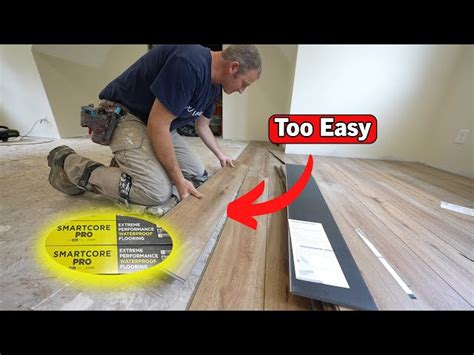
Once the underlayment is securely installed, you can begin laying the laminate planks. Start in a corner of the room, preferably along the longest wall. Position the first plank with the tongue side facing the wall. Insert spacers between the plank and the wall to create an expansion gap of approximately 1/4 inch. This gap is crucial to accommodate the natural expansion and contraction of the flooring.
Continue laying the planks end-to-end in the first row, securing them together as instructed by the manufacturer. At the end of the row, you will likely need to cut the final plank to fit. Measure the space carefully and make a clean cut with a saw, ensuring that the cut edge is placed against the wall.
Begin the second row using the leftover piece from the first row, making sure the joints are offset for enhanced strength and visual attractiveness. Position the tongue of each plank with the groove of the plank above it, and carefully tap them together using a tapping block and mallet.
Continue laying the planks across the room, ensuring a tight fit and straight rows. When you encounter doorways, corners, or other obstacles, measure carefully and cut the planks to size. Once all planks are installed, remove the spacers and get ready for the final steps.
6. Trimming and finishing touches
Once all laminate planks are laid, it’s time to perfect the floor with trim and finishing touches. Begin by removing the spacers used between planks and walls during installation. The resulting expansion gap will be concealed by the trim and molding.
Next, install baseboards or quarter-round molding around the entire room. These pieces should be securely attached to the wall, either by nailing or gluing, but not to the flooring. This allows the laminate flooring to expand and contract freely without being constrained. Make sure the molding sits perfectly flush with the laminate flooring, effectively concealing the expansion gap and providing a smooth transition between the floor and the walls.
Where laminate flooring meets other floor coverings, such as tile or carpet, install transition strips at doorways. This creates a smooth, professional finish and eliminates tripping hazards.
Last but not least, thoroughly examine the entire floor for any gaps or imperfections. Address minor gaps or chips with a color-matched laminate filler. This not only improves the visual appeal but also safeguards the floor from moisture. Once the trimming and finishing are done, your new laminate flooring will exude a professional and elegant look, infusing your living space with a fresh, updated ambiance.
7. Maintenance tips
To ensure your laminate flooring stays beautiful and lasts longer, regular maintenance is crucial. Here are some important tips for keeping your laminate floor in excellent condition:
Regular Cleaning: Sweep or vacuum the floor regularly to remove dust and debris that can cause scratching. Use a soft-bristle broom or a vacuum with a hard floor setting to avoid damaging the surface.
Damp Mopping: Clean spills and stains promptly with a damp mop and a laminate-safe cleaner. Avoid excessive water, as it can seep into the seams and cause swelling. Use a microfiber mop to ensure minimal water contact.
Avoid Harsh Chemicals: Steer clear of abrasive cleaners, waxes, or polishes that can damage the laminate’s finish. Always use products specifically designed for laminate flooring.
Use Protective Pads: Place felt pads under furniture legs to prevent scratches and dents. For high-traffic areas, consider using area rugs or mats to further protect the floor.
Control Humidity: Maintain a stable indoor humidity level to prevent the laminate from expanding or contracting. Use a dehumidifier or air conditioner if necessary.
By following these maintenance tips, you can keep your laminate flooring looking pristine and ensure it remains a beautiful part of your home for years to come.
shzow.com
